-
The following illustration depicts the imager screen:
 Figure.1
-
Click on the Raspberry Pi 5 option as depicted in the following screen:
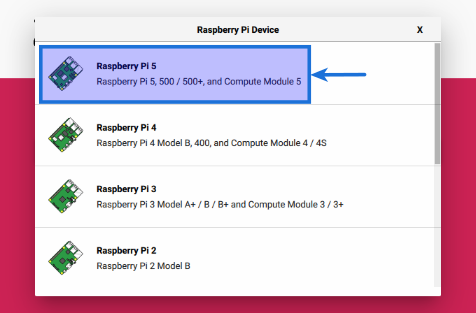 Figure.2
-
Click on the CHOOSE OS option as depicted in the following screen:
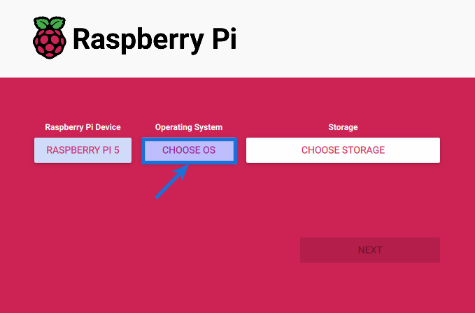 Figure.3
-
Click on the Raspberry Pi OS (64-bit) option as depicted in the following screen:
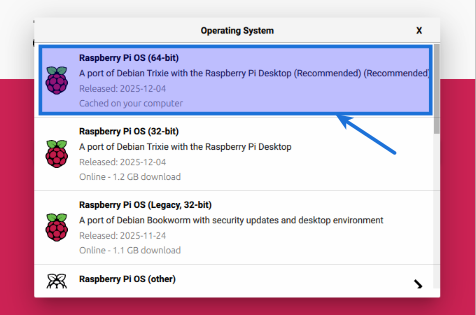 Figure.4
-
Ensure the SSD device is attached to the desktop. In this case it is a 256 GB NVMe SSD. Now, click on the CHOOSE STORAGE option as depicted in the following screen:
 Figure.5
-
Click on the SSK Storage 256 GB option as depicted in the following screen:
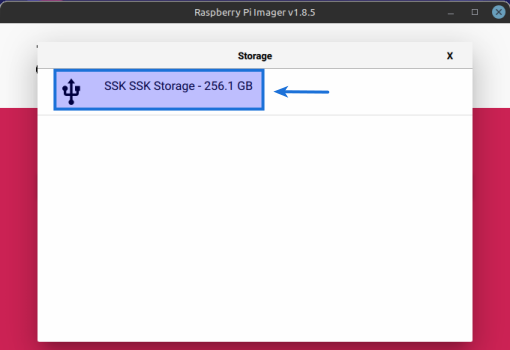 Figure.6
-
Click on the NEXT button as depicted in the following screen:
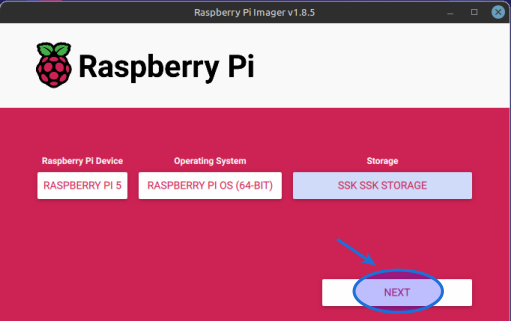 Figure.7
-
Click on the Raspberry Pi 4 option as depicted in the following screen:
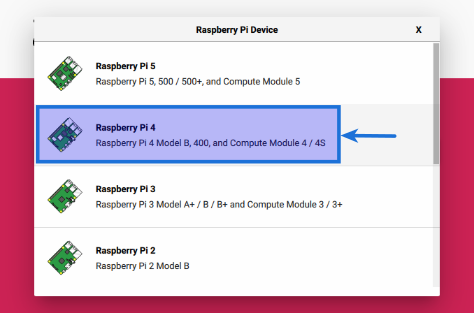 Figure.8
-
Click on the CHOOSE OS option as depicted in the following screen:
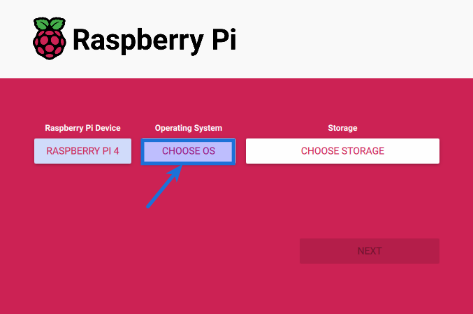 Figure.9
-
Click on the Raspberry Pi OS (64-bit) option as depicted in the following screen:
Figure.10
-
Ensure the MicroSD device is attached to the desktop. In this case it is a 32 GB MicroSD. Now, click on the CHOOSE STORAGE option as depicted in the following screen:
 Figure.11
-
Choose the Generic MassStorageClass - 30.9 GB option as depicted in the following screen:
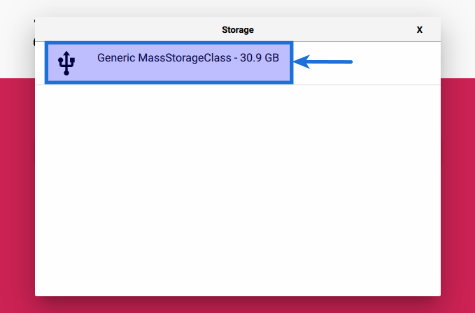 Figure.12
-
Click on the NEXT button as depicted in the following screen:
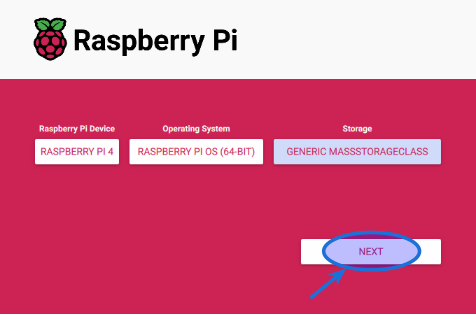 Figure.13
-
Click on the Raspberry Pi 1 option as depicted in the following screen:
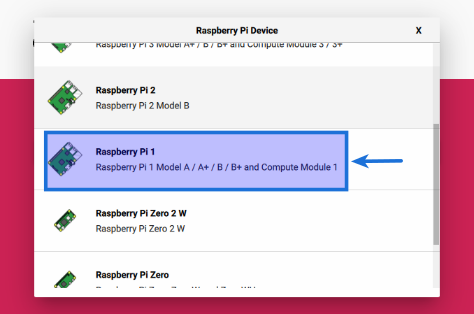 Figure.14
-
Click on the CHOOSE OS option as depicted in the following screen:
 Figure.15
-
Click on the Other general-purpose OS option as depicted in the following screen:
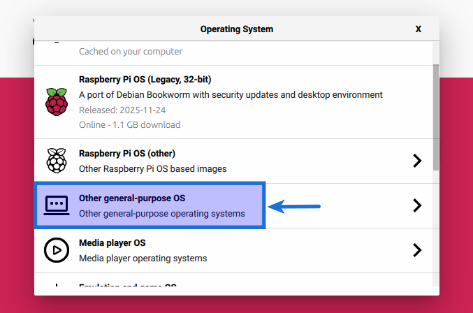 Figure.16
-
Click on the Raspberry Pi OS (Legacy, 32-bit) Lite option as depicted in the following screen:
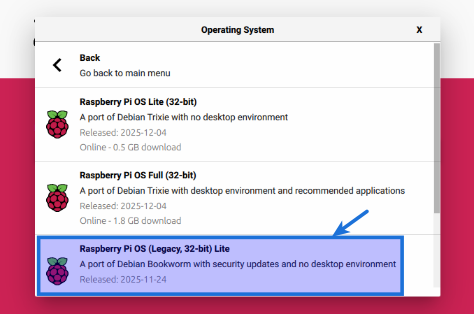 Figure.17
-
Ensure the MicroSD device is attached to the desktop. In this case it is a 32 GB MicroSD. Now, click on the CHOOSE STORAGE option as depicted in the following screen:
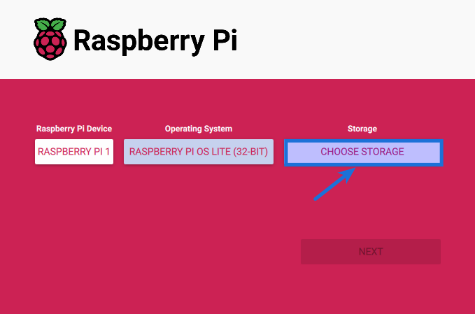 Figure.18
-
Choose the Generic MassStorageClass - 30.9 GB option as depicted in the following screen:
Figure.19
-
Click on the NEXT button as depicted in the following screen:
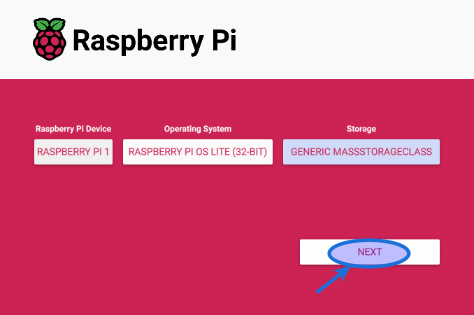 Figure.20
-
We need to customize the Raspberry Pi OS and hence click on the EDIT SETTINGS button as depicted in the following screen:
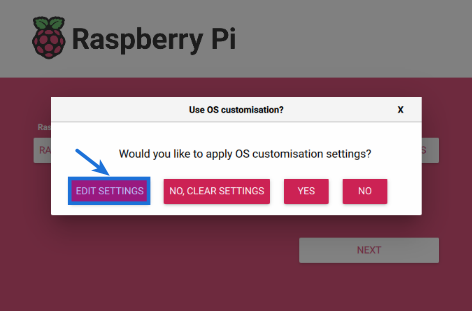 Figure.21
-
In the GENERAL tab, enter the hostname, the username & password, the desired locale settings and finally click on the SAVE button as depicted in the following screen:
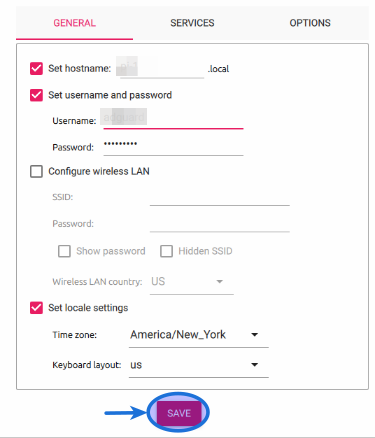 Figure.22
-
In the SERVICES tab, enable ssh and click on the SAVE button as depicted in the following screen:
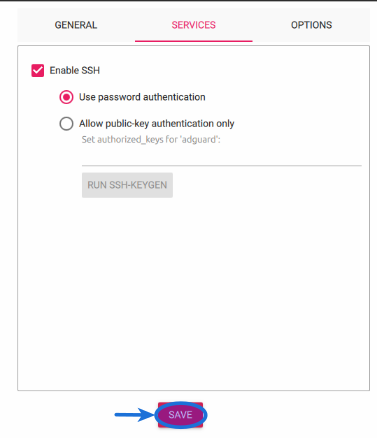 Figure.23
-
To apply the customizations, click on the YES button as depicted in the following screen:
 Figure.24
-
In the next screen, click on the YES button to begin the OS installation as shown below:
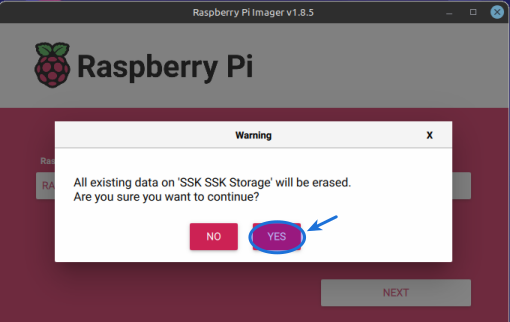 Figure.25
-
In the next screen, click on the YES button to begin the OS installation as shown below:
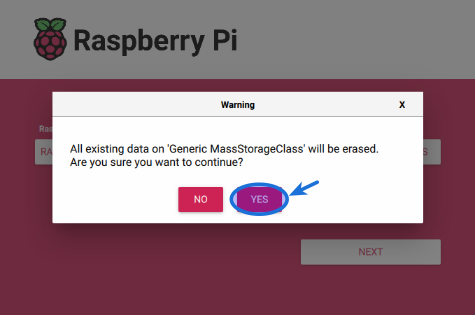 Figure.26
-
Once the Raspberry Pi OS installation and verification completes, click on the CONTINUE button as shown below:
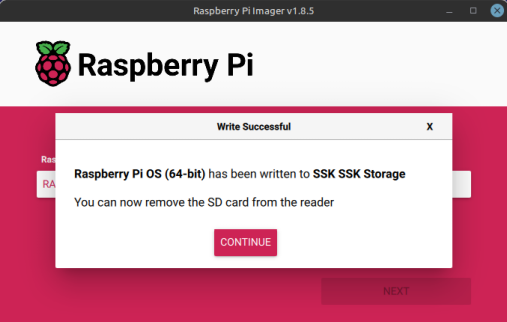 Figure.27
-
Once the Raspberry Pi OS installation and verification completes, click on the CONTINUE button as shown below:
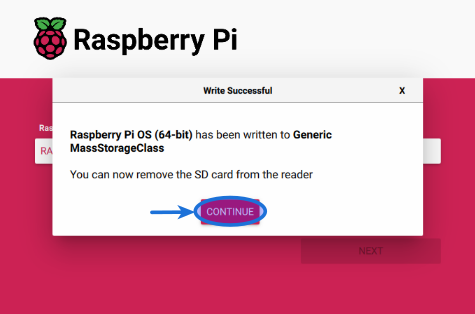 Figure.28
-
Once the Raspberry Pi OS installation and verification completes, click on the CONTINUE button as shown below:
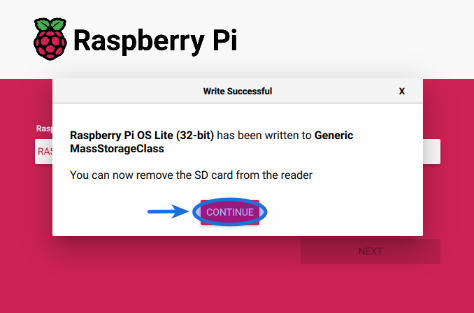 Figure.29
Case 1 :: Raspberry Pi 5 with SSD
Case 2 :: Raspberry Pi 4 with MicroSD
Case 3 :: Raspberry Pi 1 with MicroSD
Common for Case 1, Case 2, and Case 3
Case 1 :: Raspberry Pi 5 with SSD
Common for Case 2 and Case 3
Case 1 :: Raspberry Pi 5 with SSD
Case 2 :: Raspberry Pi 4 with MicroSD
Case 3 :: Raspberry Pi 1 with MicroSD