Figure.1
| PolarSPARC |
ESP32 30-Pin DevKit Basics, Setup, and Test
| Bhaskar S | 12/29/2025 |
Overview
ESP32 DevKit V1 is a very cost-effective, powerful, and programmable microcontroller with the following capabilities:
32-bit Xtensa dual-core processor (with up to 240 MHz of speed)
520 kB of internal Static RAM
4MB of Flash Memory
Built-in 802.11b/g/n WiFi
Built-in Bluetooth (4.2 and Classic)
30 GPIO pins
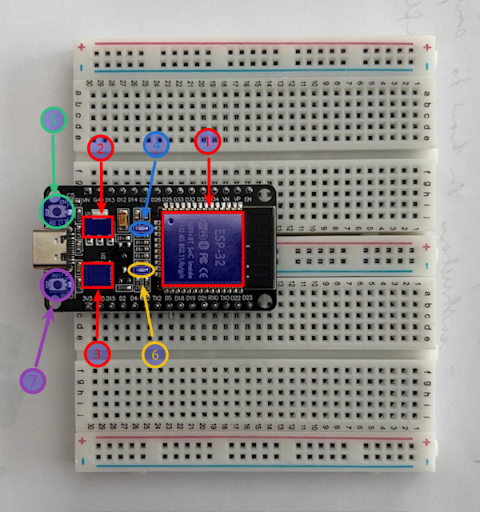
The following illustration depicts the ESP32 DevKit V1 microcontroller mounted on a breadboard:
The larger red block on the right numbered (1) is the core that houses the 32-bit processor as well as the circuitary for Wifi and Bluetooth modules. It is powered by 3.3 volts.
The smaller red block on the left top numbered (2) is the Voltage Regulator that steps the 5 volts coming from the USB-C input to a steady 3.3 volts.
The smaller red block on the left bottom numbered (3) is the USB to Serial converter, which enables communication between a computer (via USB signal) and the ESP32 board (via Serial signal).
The blue circle between (2) and (1) in the center numbered (4) is the Power LED.
The yellow circle between (3) and (1) in the center numbered (6) is the Built-in Onboard LED that can be controlled via the GPIO pin 2.
The green circle to the top left numbered (6) is the Reset button to reset the ESP32 board.
The purple circle to the bottom left numbered (7) is the Boot button to upload code to the ESP32 Flash.
Development Setup
The programming of the ESP32 board will be done using Visual Studio Code in combination with the PlatformIO IDE extension.
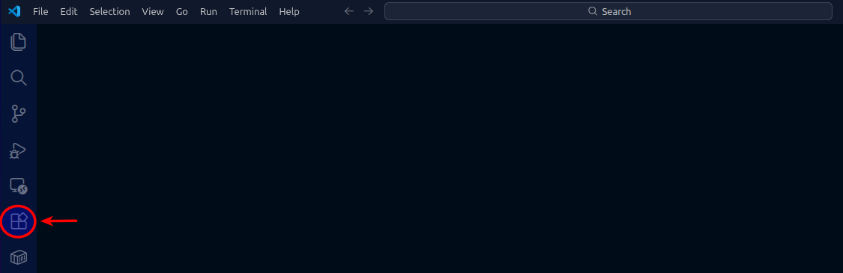
Launch Visual Studio Code and click on the Extensions icon as shown in the illustration below:
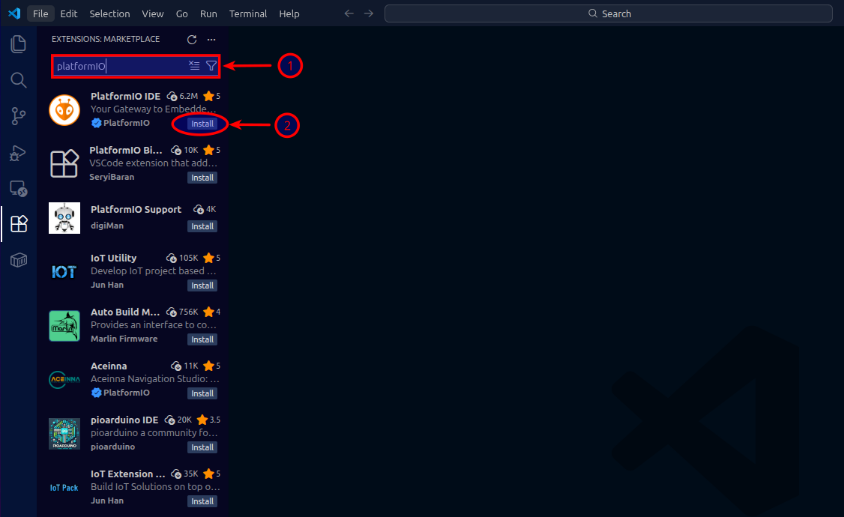
Search for the text platformIO and click on the install icon under the extension PlatformIO IDE as shown in the illustration below:
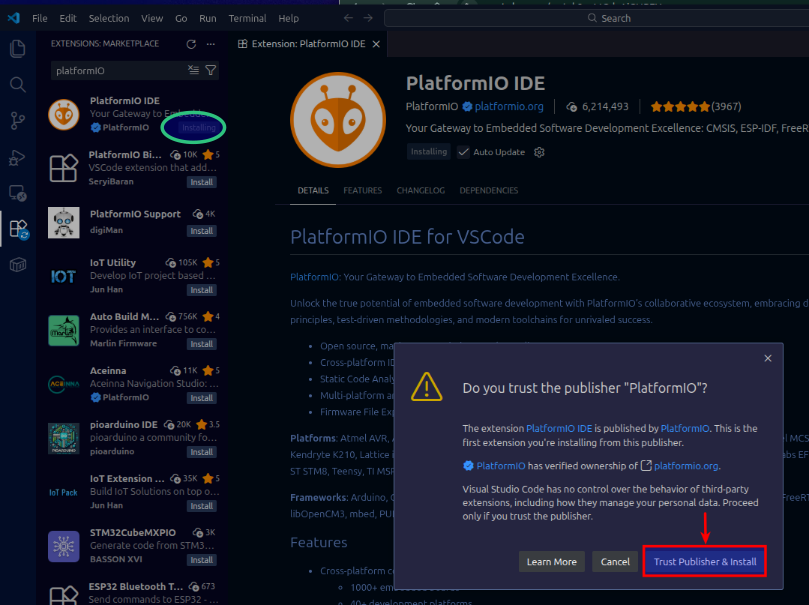
Click on the Trust Publisher & Install button on the pop-up as shown in the illustration below:
The installation will take a few seconds to complete.
Once the installation completes successfully, the PlatformIO extension icon will appear on the left as shown in the illustration below::
To avoid any issues, restart the Visual Studio Code IDE.
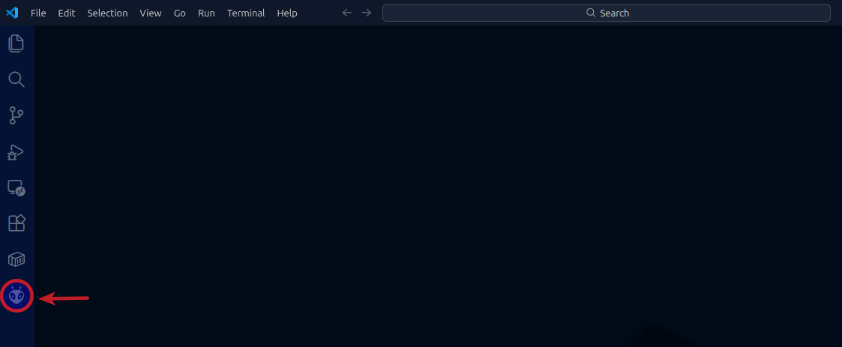
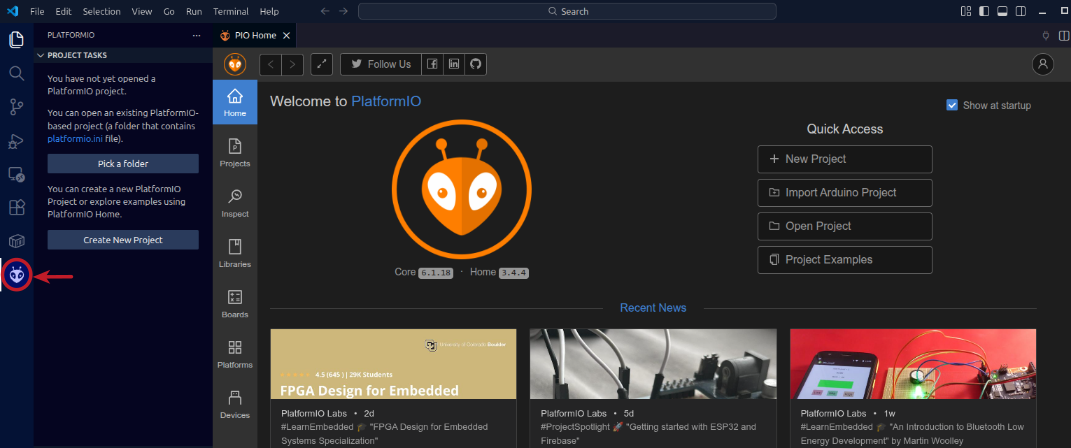
Clicking on the PlatformIO extension icon (on the left) will launch a new tab PIO Home as shown in the illustration below:
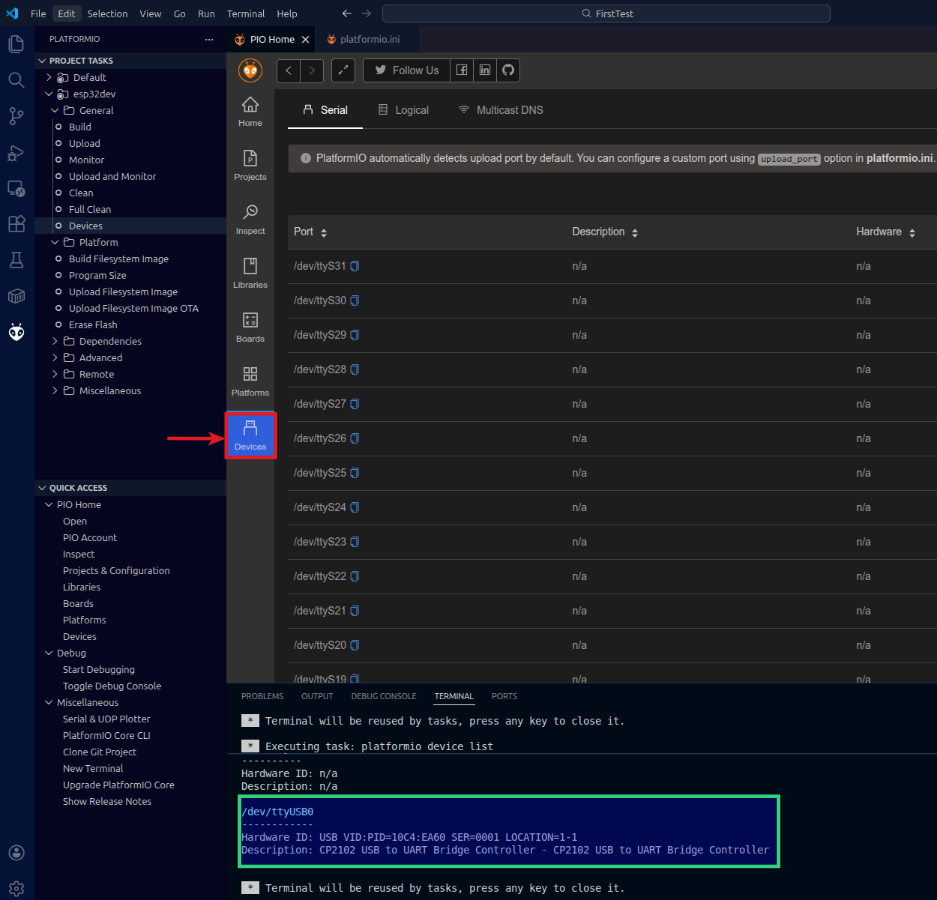
At this point, we are ready to power-up the ESP32 microcontroller using a USB-C cable. Plug the USB-C cable to the ESP32 board and the other end of the cable to the computer running Visual Studio Code with PlatformIO extension.
As the ESP32 board boots up, click on the Devices icon of the PIO Home tab to display various ports. Also, the Terminal window will activate (at the bottom) to display scrolling text as shown in the illustration below:
Now, moving to the fun part of the ESP32 microcontroller exploration !!!
Hands-on with ESP32
Our first Hello World equivalent project for the ESP32 microcontroller will be called BlinkLED, whose purpose would be to turn-on and turn-off the built-in LED of the ESP32 board in a loop.
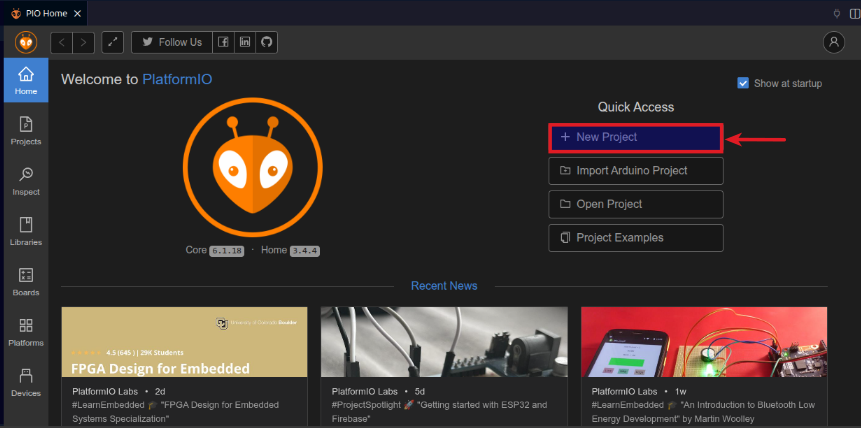
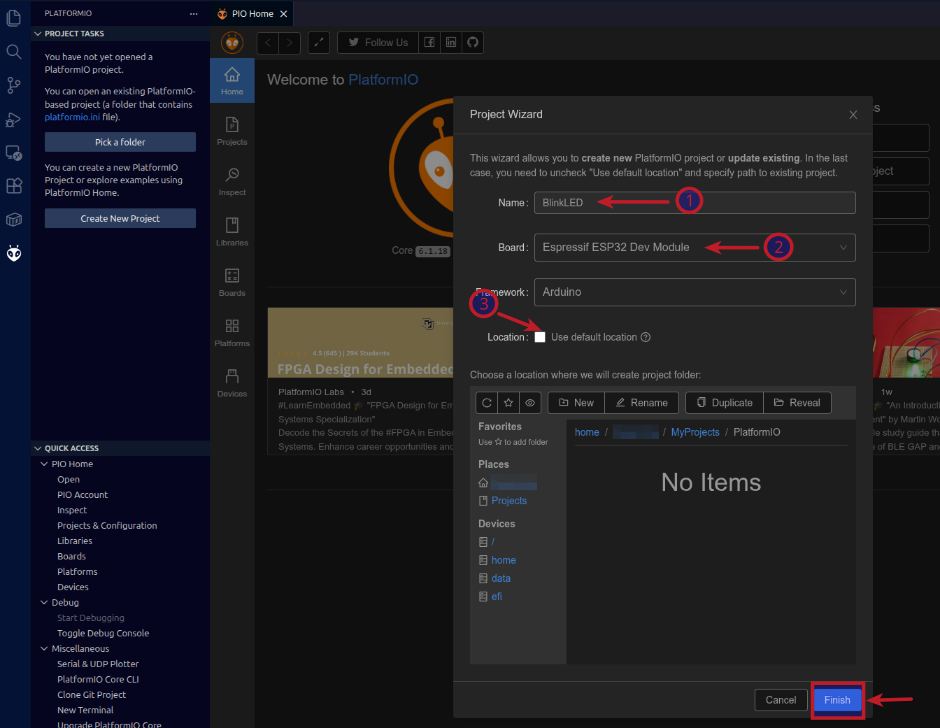
To create our first project, click on the New Project button on the PIO Home screen as shown in the illustration below:
(1) Enter the project name as BlinkLED, (2) select the board Expressif ESP32 Dev Module, leave the framework to the defaulted Arduino, (3) uncheck the box and select the directory location for the project, and finally click on the Finish button as shown in the illustration below:
This will take a few minutes to initialize and setup.
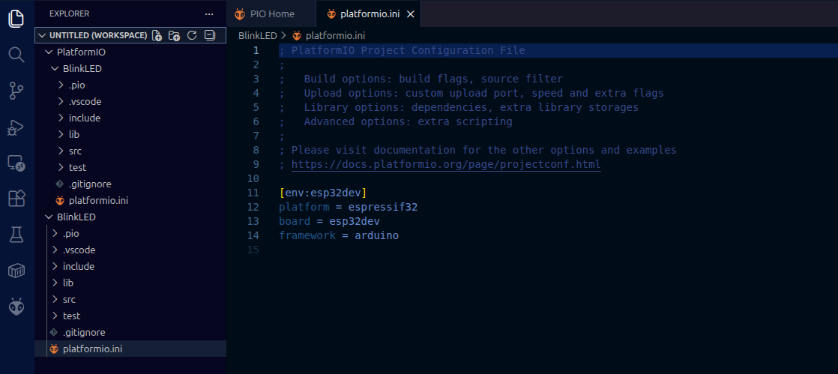
Once the BlinkLED project is initialized and setup successfully, Visual Studio Code will open a new tab with the contents of the file platformio.ini as shown in the illustration below:
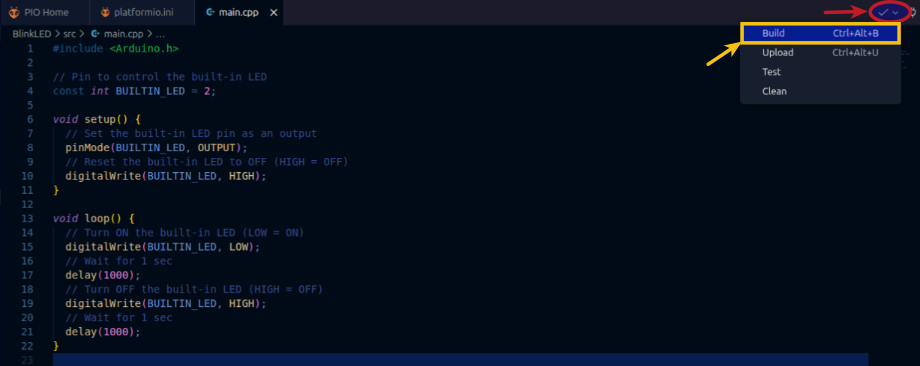
The BlinkLED project includes a default ESP32 code sketch named main.cpp in the src directory as shown in the illustration below:

The function void setup() is for initialization, while the function void loop() includes the main code to run in the ESP32 microcontroller in a loop.
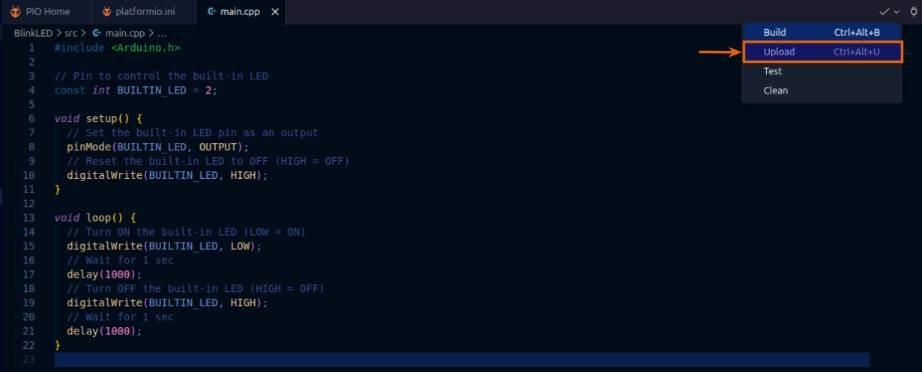
We will modify the code in main.cpp with the following content, which implements the desired logic of turning ON and OFF the built-in ESP32 board LED (controlled via the GPIO pin 2):
#include <Arduino.h>

// Pin to control the built-in LED
const int BUILTIN_LED = 2;

void setup() {
  // Set the built-in LED pin as an output
  pinMode(BUILTIN_LED, OUTPUT);
  // Reset the built-in LED to OFF (HIGH = OFF)
  digitalWrite(BUILTIN_LED, HIGH);
}

void loop() {
  // Turn ON the built-in LED (LOW = ON)
  digitalWrite(BUILTIN_LED, LOW);
  // Wait for 1 sec
  delay(1000);
  // Turn OFF the built-in LED (HIGH = OFF)
  digitalWrite(BUILTIN_LED, HIGH);
  // Wait for 1 sec
  delay(1000);
}
To build the code for the BlinkLED project, click on the drop-down on the top right corner and then click on the Build option as shown in the illustration below:
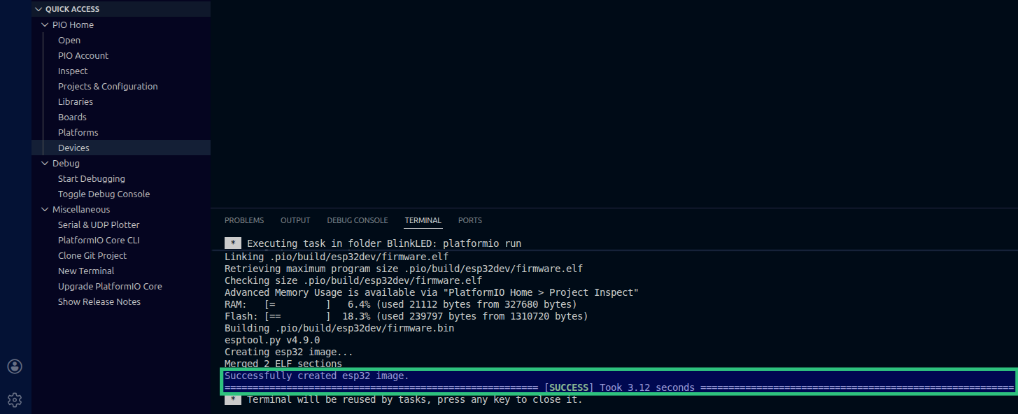
The build will kick-off in the Terminal window at the bottom and if the code for the ESP32 project is error-free, it will build a successful image as shown in the illustration below:
The final step is to flash the ESP32 microcontroller with the just built image. To upload the image for the BlinkLED project, click on the drop-down on the top right corner and then click on the Upload option as shown in the illustration below:
The very first time when an image is uploaded to the ESP32 microcontroller, one would see the following error in the Terminal window:
A fatal error occurred: Could not open /dev/ttyUSB0, the port is busy or doesn't exist.
([Errno 13] could not open port /dev/ttyUSB0: [Errno 13] Permission denied: '/dev/ttyUSB0')
To fix this issue, open a terminal window on the computer to which the ESP32 board is connected and execute the following two commands:
$ sudo adduser $USER dialout
$ sudo chmod a+rw /dev/ttyUSB0
For the changes to take effect, reboot the computer to which the ESP32 board is connected.
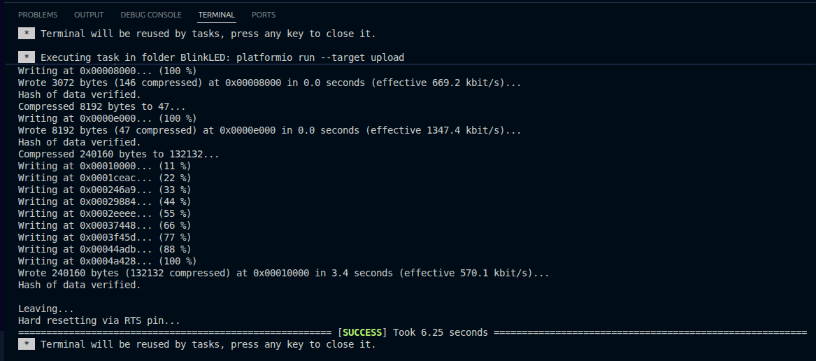
After the reboot, once again try to upload the image for the BlinkLED project and this time the upload should complete successfully as shown in the illustration below:
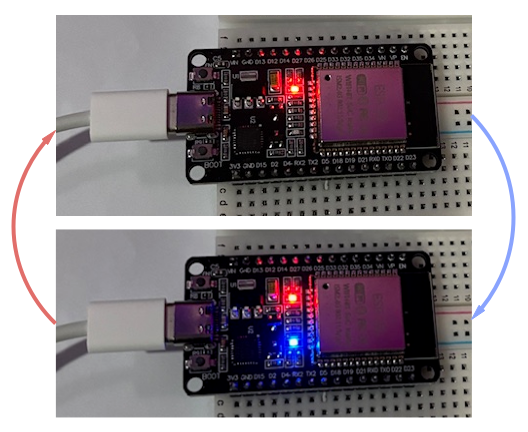
The ESP32 microcontroller built-in LED will turn ON and OFF in a loop as shown in the illustration below:
With this, we conclude the hands-on demonstration of the setup and the test of the wonderful ESP32 microcontroller !!!
References