Figure.1
| PolarSPARC |
DHT22 Sensor with ESP32 - Setup and Test
| Bhaskar S | 01/02/2026 |
Overview
DHT22 is a a humidity and temperatur sensor with the following features:
Working voltage between 3V to 5.5V
Humidity measurements between 0 % RH to 100 % RH with accuracy of 2%
Temperature measurements between -40 degrees C to 80 degrees C with accuracy of 0.5%
Signal output is digital
Measurement resolution of 16 bits
The DHT22 sensor can be wired to the ESP32 microcontroller (via a breadboard) to read the room humidity and temperature at frequent intervals.
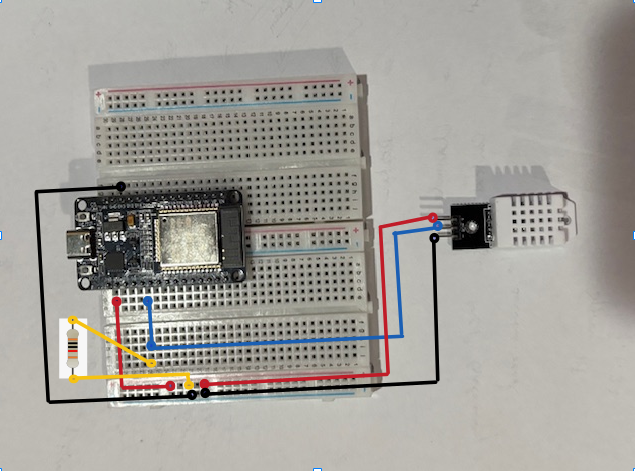
The following illustration depicts the wiring schematic ESP32 with DHT22 on a breadboard:
The red wire connects the first pin marked 3.3 volts on the ESP32 to the power pin (marked +) on the DHT22.
The black wire connects the pin marked GND on the ESP32 to the ground pin (marked -) on the DHT22.
The blue wire connects the GPIO pin marked D4 on the ESP32 to the middle pin (marked OUT) on the DHT22.
The yellow wire connects one end of a 10K ohm resistor to the power line (where the red wires connect), while the other end connects to the sensor out line (where the blue wires connect).
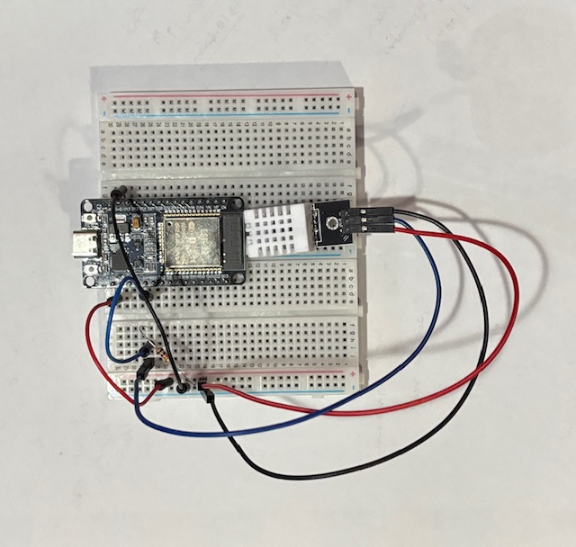
The following illustration depicts the breadboard with the actual wiring with the components:
Hands-on ESP32 with DHT22
The DHT22 sensor project using the ESP32 microcontroller will be called DHT22Sensor, whose purpose would be to read the sensor measurements every 5 seconds in a loop.
To create our DHT22 sensor project, click on the New Project button on the PIO Home screen, enter the project name as DHT22Sensor, select the board as Expressif ESP32 Dev Module, leave the framework to the defaulted Arduino, uncheck the box and select the directory location for the project, and finally click on the Finish button.
This will take a few seconds to initialize and setup.
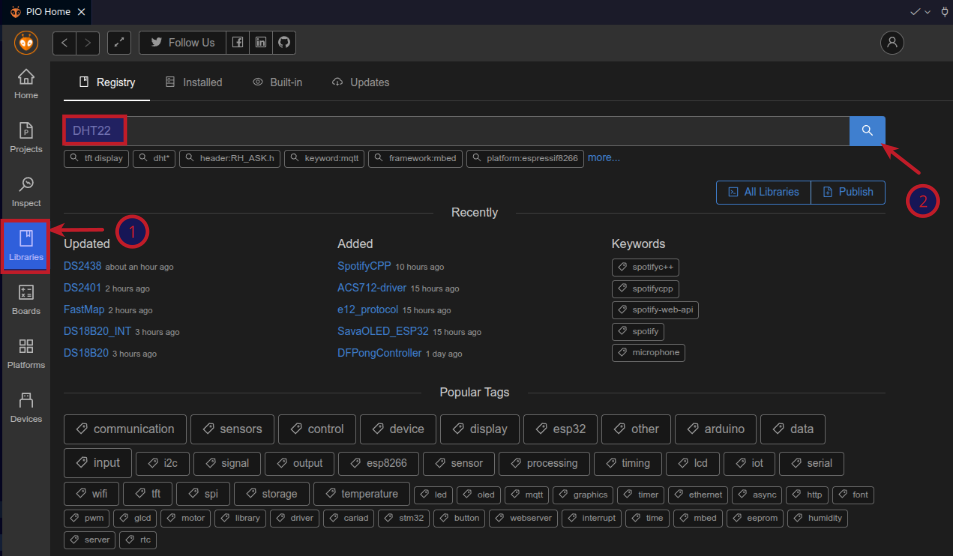
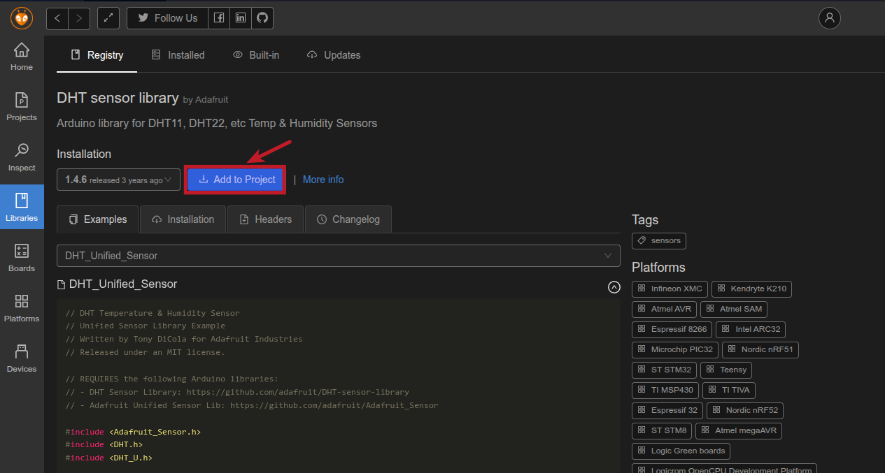
For interfacing with the DHT22 sensor, we need to add a library to the PlatformIO development environment. In order to do just that, click on the Libraries icon. This will open the library registry screen with a textbox to search for libraries. Enter DHT22 in the textbox and click on the search icon as shown in the illustration below:
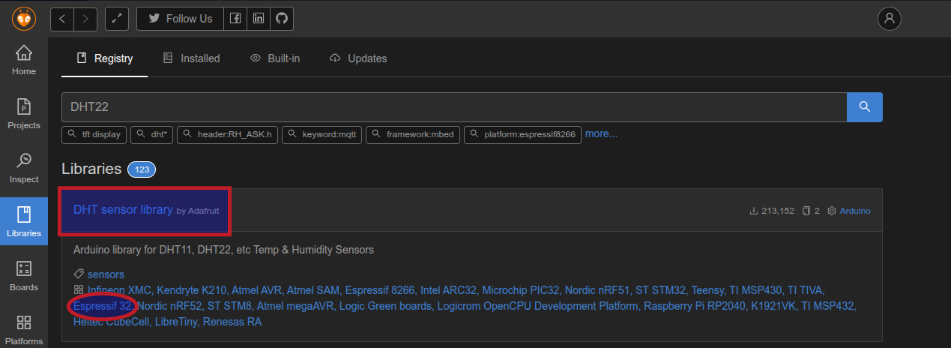
Choose the library labeled DHT sensor library (by Adafruit) by clicking on it as it support the Expressif 32 as shown in the illustration below:
Click on the Add to project to include the chosen library as the dependency for a given project as shown in the illustration below:
Select the project DHT22Sensor to include the DHT sensor library library and click on the Add button as shown in the illustration below:

We will modify the code in main.cpp with the following content, which implements the desired logic of reading DHT22 sensor measurements and displaying the results via the serial output:
/*
 * Name:   DHT22 Sensor for Temperature & Humidity
 * Author: Bhaskar S
 * Date:   01/02/2026
 * Blog:   https://polarsparc.github.io
 */

#include <Arduino.h>
#include <DHT.h>
#include <DHT_U.h>

// DHT sensor type
#define DHTTYPE DHT22

// GPIO Pin 4 (D4 on the board)
const int GPIO4 = 4;

// Initialize DHT sensor
DHT_Unified dht(GPIO4, DHTTYPE);

void setup() {
  Serial.begin(9600);
  Serial.println(F("DHT22 - Setup"));

  sensor_t sensor;

  // Display temperature sensor details
  dht.temperature().getSensor(&sensor);
  Serial.println(F("------------------------------------"));
  Serial.println(F("Temperature Sensor"));
  Serial.print  (F("Sensor Type: ")); Serial.println(sensor.name);
  Serial.print  (F("Driver Ver:  ")); Serial.println(sensor.version);
  Serial.print  (F("Unique ID:   ")); Serial.println(sensor.sensor_id);
  Serial.print  (F("Max Value:   ")); Serial.print(sensor.max_value); Serial.println(F("°C"));
  Serial.print  (F("Min Value:   ")); Serial.print(sensor.min_value); Serial.println(F("°C"));
  Serial.print  (F("Resolution:  ")); Serial.print(sensor.resolution); Serial.println(F("°C"));
  Serial.println(F("------------------------------------"));

  // Display humidity sensor details
  dht.humidity().getSensor(&sensor);
  Serial.println(F("Humidity Sensor"));
  Serial.print  (F("Sensor Type: ")); Serial.println(sensor.name);
  Serial.print  (F("Driver Ver:  ")); Serial.println(sensor.version);
  Serial.print  (F("Unique ID:   ")); Serial.println(sensor.sensor_id);
  Serial.print  (F("Max Value:   ")); Serial.print(sensor.max_value); Serial.println(F("%"));
  Serial.print  (F("Min Value:   ")); Serial.print(sensor.min_value); Serial.println(F("%"));
  Serial.print  (F("Resolution:  ")); Serial.print(sensor.resolution); Serial.println(F("%"));
  Serial.println(F("------------------------------------"));

  dht.begin();
}

void loop() {
  // 5 seconds delay between measurements
  delay(5000);

  // Sensor event for reading data
  sensors_event_t event;

  float temperature = 0.0;

  // Read Temperature
  dht.temperature().getEvent(&event);
  if (! isnan(event.temperature)) {
    temperature = event.temperature;
  }

  float humidity = 0.0;

  // Read Humidity
  dht.humidity().getEvent(&event);
  if (! isnan(event.relative_humidity)) {
    humidity = event.relative_humidity;
  }

  // Check if any of the read events failed
  if (isnan(event.temperature) || isnan(event.relative_humidity)) {
    Serial.println(F("DHT22 - Read event failed !!!"));
    return;
  }

  Serial.print(F("Humidity: "));
  Serial.print(humidity);
  Serial.print(F("%  Temperature: "));
  Serial.print(temperature);
  Serial.println(F("°C"));
}
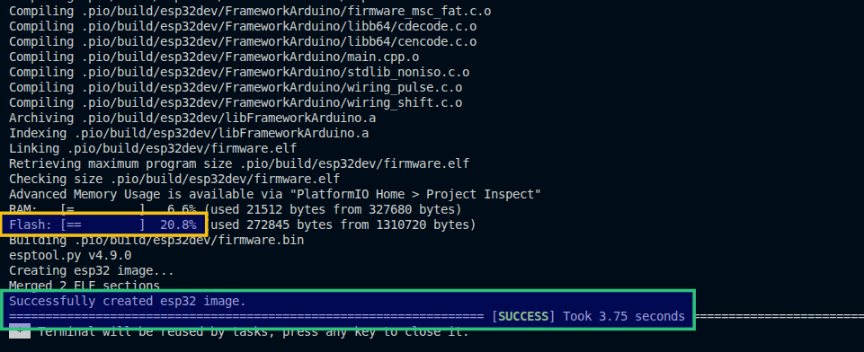
To build the code for the DHT22Sensor project, click on the checkmark icon located on the bottom left corner of the status area as shown in the illustration below:

The build will kick-off in the Terminal window at the bottom and if the code for the ESP32 project is error-free, it will display the percentage of flash used by this image and a successful build message as shown in the illustration below:
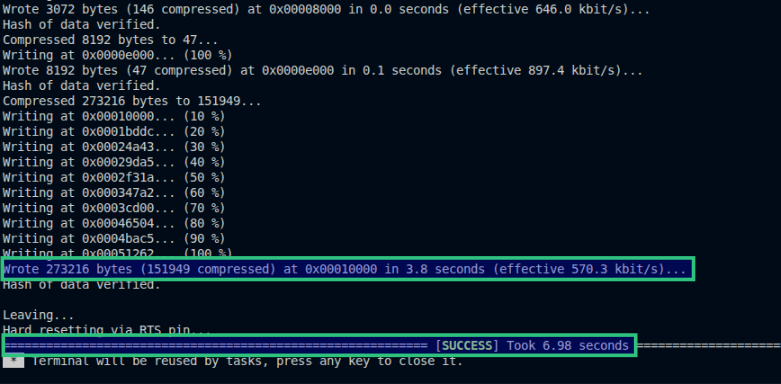
The next step is to flash the ESP32 microcontroller with the just built image. To upload the image for the DHT22Sensor project, click on the left arrow icon located on the bottom left corner of the status area as shown in the illustration below:

Once the image upload for the DHT22Sensor project completes, the Terminal window at the bottom will display a success message as shown in the illustration below:
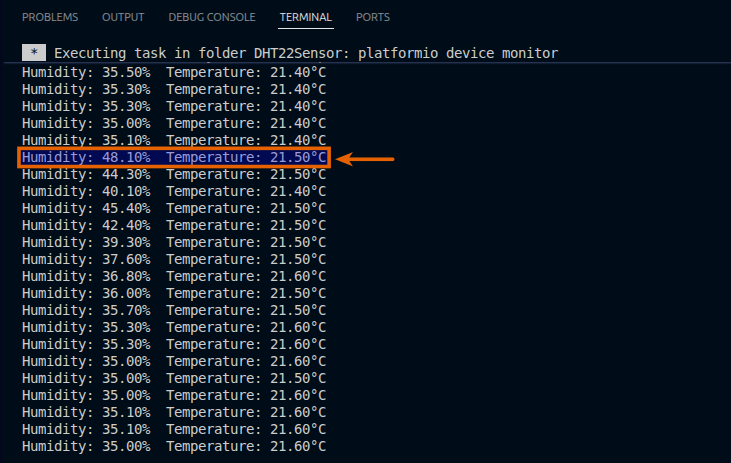
To observe the DHT22 sensor readings from the serial line, click on the plug icon located on the bottom left corner of the status area as shown in the illustration below:

The illustration below depicts the readings being printed on the console. Notice the humidity readings going up as a result of me exhaling steam from mouth on the sensor:
With this, we conclude our hands-on demonstration of the test of the DHT22 sensor with the ESP32 microcontroller !!!
References